Photographer’s Corner: Color Calibration-Getting the Results You Want, by C. David Tobie
November 8th, 2012
C. David Tobie has been involved in color management and digital imaging since its early development and is the Global Product Technology  Manager at Datacolor, where he develops new products and features for their Spyder line of calibration tools. From the beginning, he has worked to see affordable solutions put in place for graphic design, pre-press, photography and digital imaging and then taught users how best to utilize them. He has consulted internationally for a wide range of color-related companies, and is best known by photographers for his writing and technical editing of texts and periodicals for the photo industry including Mastering Digital Printing, and Professional Photographer magazine, as well as his seminars on color and imaging at photographic workshops around the globe.
David’s work has received a long line of digital imaging product awards including the coveted TIPA award, and a nomination for the DesignPreis. From 2007-2010, he was recognized by Microsoft as an MVP in Print and Imaging. Much of David’s recent writing can be found at his photography blog and samples of his photography can be seen at www.cdtobie.com. The following interview with him includes answers to important questions about color calibration that will help you deliver images as true to the colors you captured when you took the photograph.
What are some common misconceptions or mistakes new photographers can make about monitor calibration that you can clear up right off the bat?
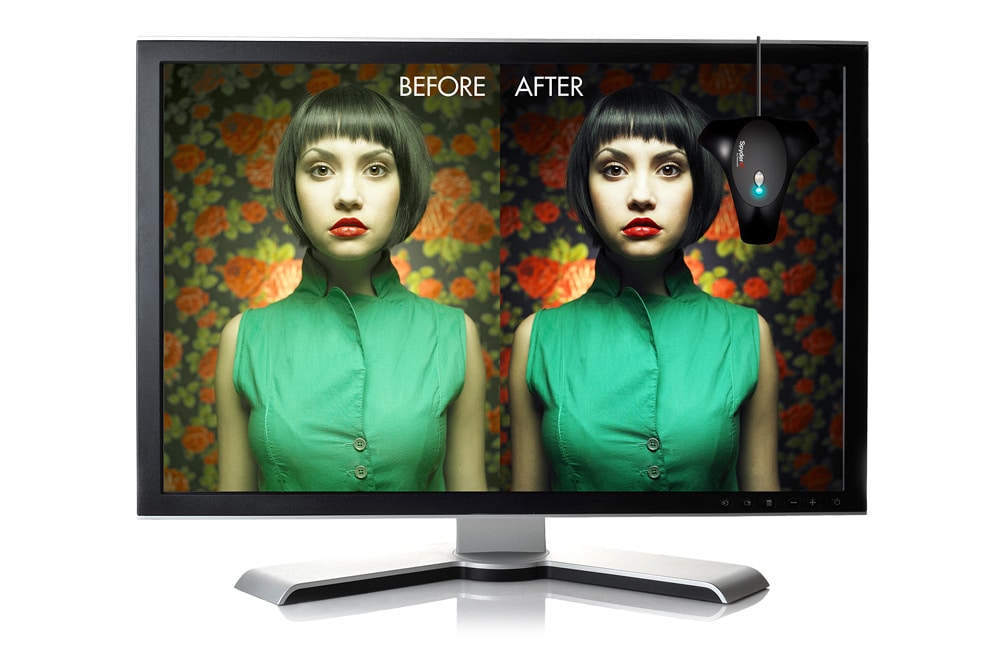
The most common color complaint of all is: “My prints are darker than the same image on screen.” The easy answer to this is: your screen is too bright. Displays ship from the factory set-up to look good in a bright store or office. For image editing you need to calibrate the display to more appropriate brightness level, as well as other better settings, and use in a dimly lit, controlled space. Assisting you with fixing this is the biggest single improvement that color management can offer.

How can I calibrate my monitor to match printer output? Do I need to print something (i.e. a color chart) and then use that in the calibration process?
Following the advice above, and calibrating your display, including dimming it to coordinate with your low ambient (room) light, is the first and biggest step. If you use paper and inks from your printer manufacturer, and have a good, recent, graphics-grade printer, this should result in a pretty good match already. If you are looking for more, it’s certainly available. Custom printer profiling can further improve your screen-to-print match, reduce your trial-and-error test prints, saving time and money, and offer all sorts of other advantages for serious printmaking.
Do I need to repeat this process for multiple printers or the same printer using different types of paper? Can you save multiple calibration profiles and switch between them as needed for the printer/paper you plan to use?
Print profiles are used in two ways. First, to preview what a given image will look like printed with that printer, ink, and paper. Also to optimize how it will look on that combination. Second, to actually print that image on that printer, ink and paper. So each profile is unique to a printer, ink, and paper combination. Paper company supplied profiles are a help, as they reflect the printer model, and the paper in question, but only with one ink type (the type that comes from the manufacturer) and only for a generic example of that printer (each printer unit can vary, as can the ink in your printer). So the ideal solution for serious printing is a true custom profile that reflects your printer, your inks, and your paper. Then create another for each combination you use, selected from the printer profile dropdown list at the time of printing. If your results start to drift over time reprofiling will bring them back in line, whether it’s printer wear, ink settling, or changes in paper coating that have caused it.
Concerning brightness, contrast and shadows; how can I make sure that these are accurate and that the brightness and exposure I see on my screen will match my prints and other monitors as best as possible?
 Display calibration helps. Display calibration in a dim and consistent viewing environment helps more. That’s why Spyder4PRO and Spyder4ELITE try to get you to check yourambient light, and suggest the appropriate setting to relate to it. By doing this you’ll get consistent display on any properly calibrated display, in its properly controlled lighting environment. Printing is another issue. For self-printing, tuning your custom output profiles to open the shadows on matte fine art paper, or adjusting the density range for baryta papers, can improve your soft proof and your final results, saving trial and error printing. For outsourced printing, getting their ICC profile and tuning your images to look good through it is an option. Printing Datacolor’s Matrix Test Image through your outsource, and using it as a comparison print, is another helpful tool. You can find this in the Test Image folder in each of the Datacolor products.
How can I make sure that when I retouch an image it will look true to color and saturation in my online portfolio? Do I need to be concerned about different internet browsers?
A calibrated display is your first tool. Working in sRGB for the web is next. Then most browsers will at least make a sRGB to Display Profile conversion to display your images. A few browsers can actually convert tagged images in other color spaces, such as AdobeRGB, for correct viewing. But you can’t assume most users will have this set up and working, so your best bet is to convert all images for the web to sRGB. I encourage your customers to calibrate their displays, or to view their images on their own system, at least once. This will provide a sense of what things should look like on a calibrated display, under controlled light.
When two monitor displays are properly calibrated, shouldn’t they be exactly the same in terms of the colors and, reasonably speaking, the brightness they produce for a given image? Many times two monitors made by different manufacturers will both be calibrated properly but look different from one another. How can this be?
A display calibrator matches displays for the way that calibrator “sees” them. Making calibrators react as similarly to the eye as possible is desirable. However, even two different people may see them a bit differently. That’s why the SpyderTune function in Spyder4Elite is important. It lets the user visually tune side-by-side displays for the closest possible match, and continues to apply this correction to future calibrations.
If I get a photo printed at a lab is it possible that the same image would look slightly different if I print it again later? Or does color calibration ensure that images will always be printed in the correct color space, regardless of the lab’s staff?
If your photo labs calibrate their labs regularly, then consistency will be quite good. High quality professional labs certainly do this, such as Zenfolio partner Mpix, while lower priced labs may not use custom color management at all. I use low cost labs only if I first send them a profiling target from SpyderPrint, then build a custom printer profile for the lab, and convert all my images to that profile before sending them to the lab. It’s more work, but allows me to use a local low cost lab. Most people prefer to leave the output color management to the lab, instead of doing it themselves, but you may have to pay a premium price at a well-known lab to get accurate color on lab prints.
As you can see, there are many different factors that can effect the color calibration of your monitors, etc. If you would like to learn more, be sure to read the SpyderBlog from C. David Tobie. It includes all the latest tips, tricks, and trends in color calibration, Webinars, and much more.
Our next Photographer’s Corner will focus on retouching and feature expert analysis from Lori Smith, who has nearly 25 years experience as a photographic artist for Miller’s Professional Imaging/Mpix. If you have a specific question regarding retouching, please enter it into the comments field below and we may include it in the upcoming post.


